inki

Wireless information displays for modern spaces
Home automation display - inki-homematic
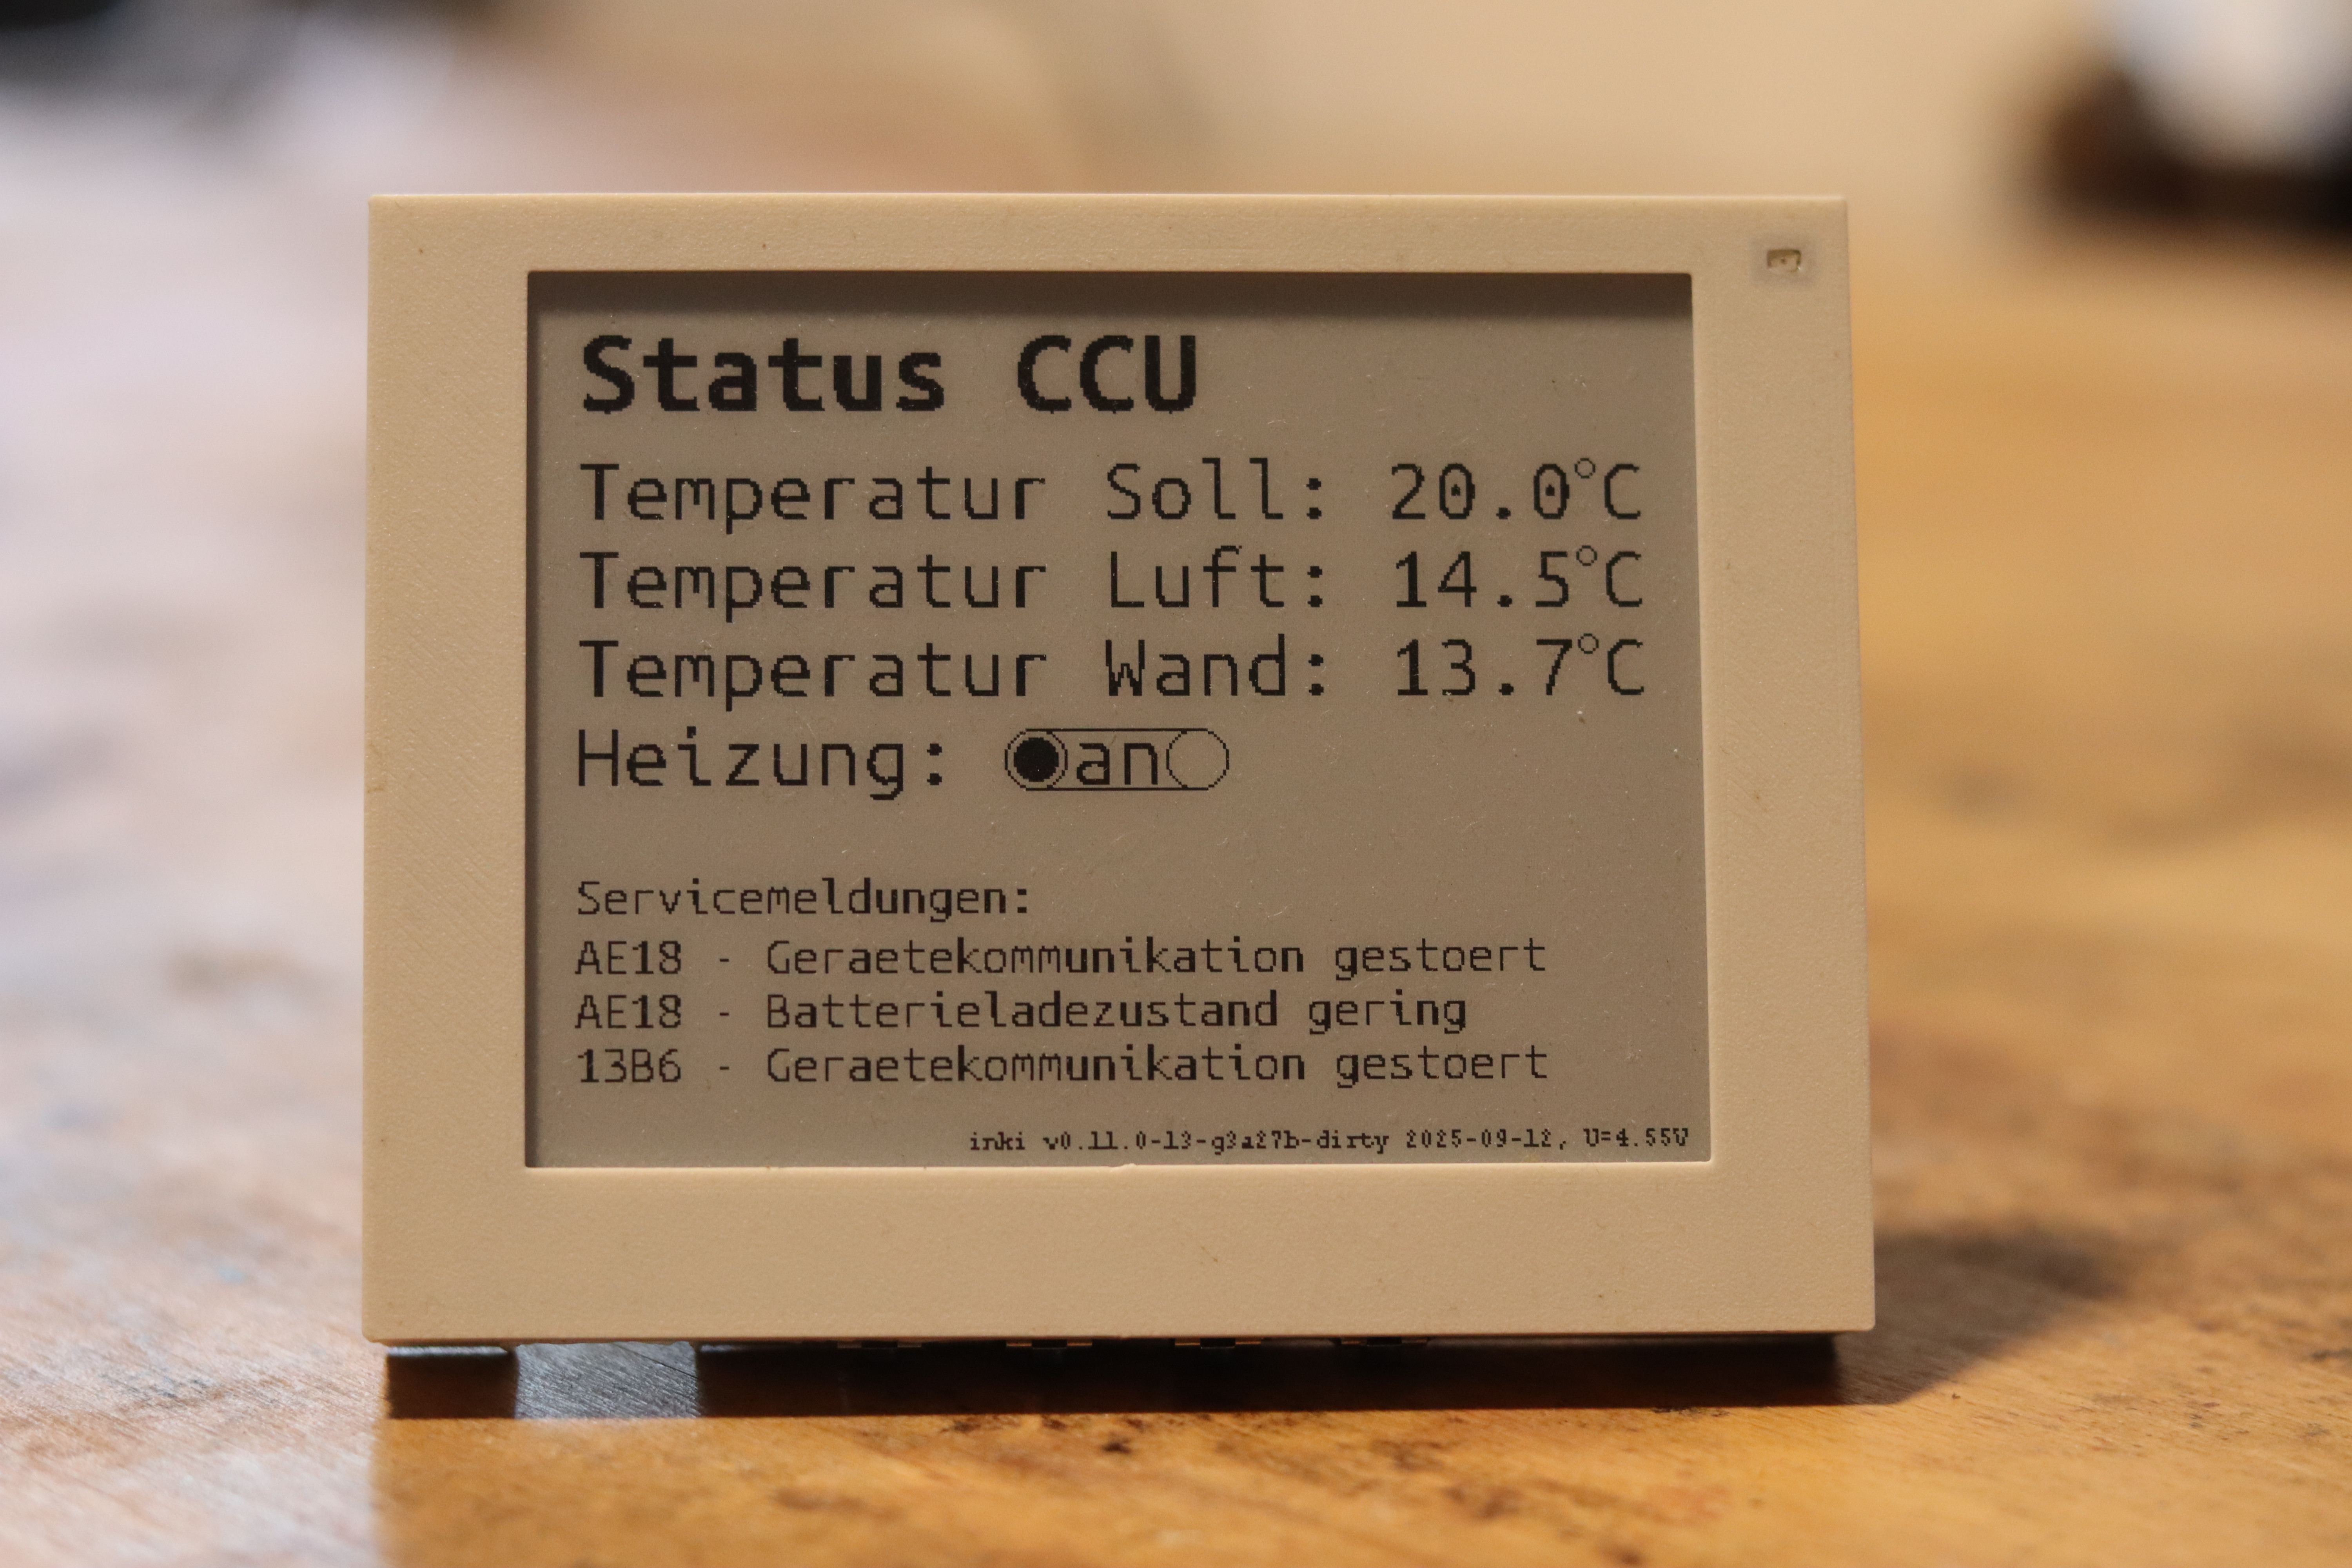
Homematic sensor data displayed on 4.2" ePaper showing temperature, heating status, and service messages
Overview
Home automation systems collect a wealth of real-time data from sensors and devices throughout your home. While you can always check this information through web interfaces or mobile apps, there’s something uniquely convenient about having key information automatically displayed on a dedicated “electronic dashboard” that you can glance at during your daily routine. Above you see inki displaying live data from our Homematic system - temperatures from HmIP-STE2-PCB sensors, heating control status from HmIP-WTH-1, and power monitoring from HmIP-PSM-2 devices.
Inki-homematic directly connects to your Homematic CCU via XML-RPC, retrieving and displaying live sensor data and device status information. It integrates seamlessly with existing Homematic installations to provide wireless ePaper visualization of your home automation data. In general any homematic device parameter can be read out by configuring inki via the webinterface, see the examples below.
Live demonstration of inki-homematic displaying real-time sensor data and updates
Examples
- Temperature monitoring from HmIP-STE2-PCB sensors with real-time display
- Heating system control showing target and actual temperatures from HmIP-WTH-1
- Power monitoring displaying switch states and consumption from HmIP-PSM-2
- XML-RPC integration for direct CCU communication without additional software
- Service message display showing system alerts and device status information
- Ultra-low power operation with ~10,000 queries per battery set
- Wireless configuration via web interface with automatic updates
Configuration & Setup
You can easily configure inki-homematic through the web interface, such as from your smartphone. Here’s what the configuration screens look like:
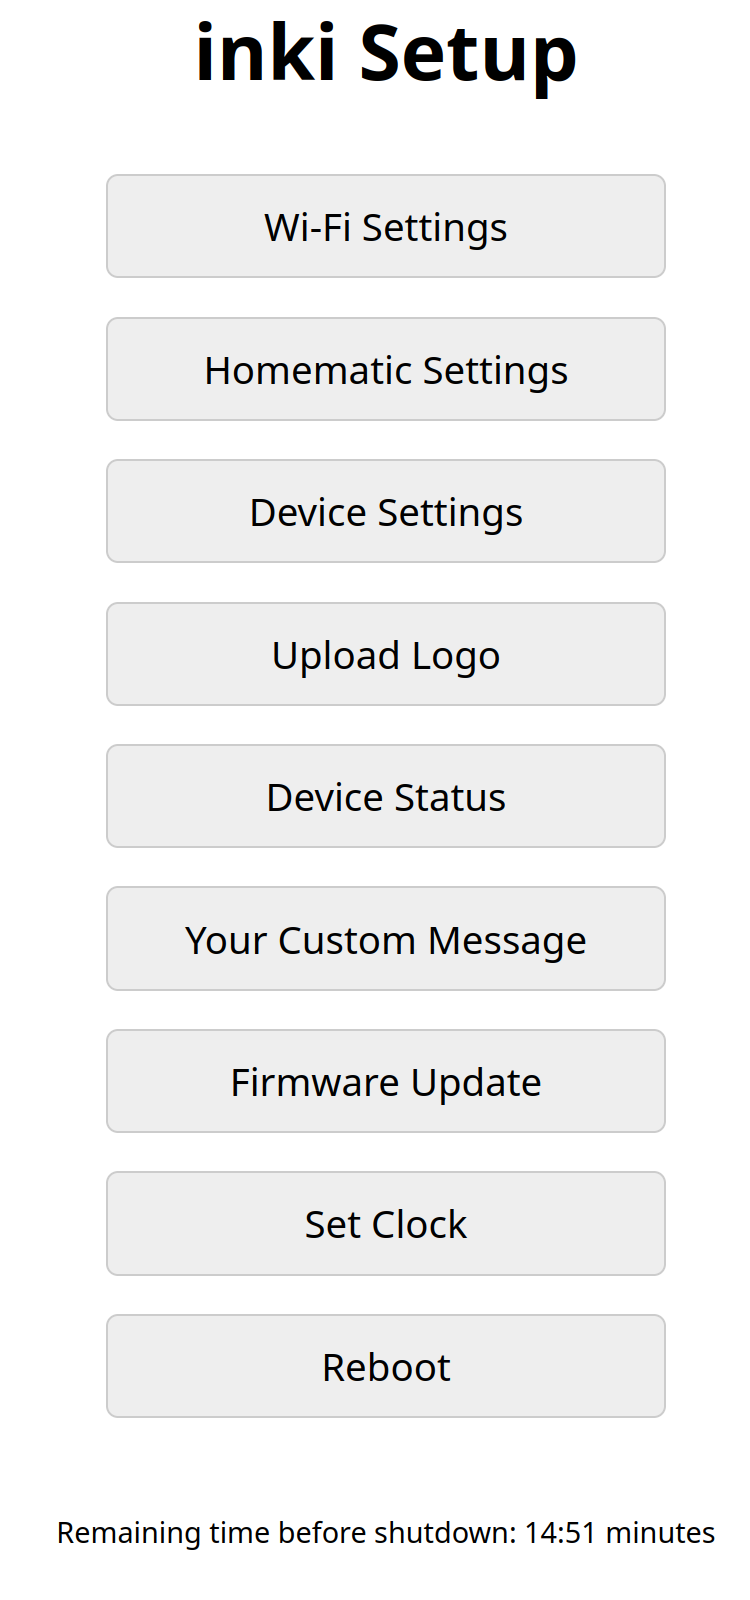
Main configuration screen
Specific homematic settings are accessed by the corresponding page and allow to set the relevant parameters:
Web Interface Setup:
- Homematic CCU IP address and port configuration (typically port 2010)
- Device ID mapping for up to 6 sensor/actuator data points
- Value type selection (ACTUAL_TEMPERATURE, STATE, POWER, etc.)
- Display labels and update interval scheduling
- WiFi credentials and network settings
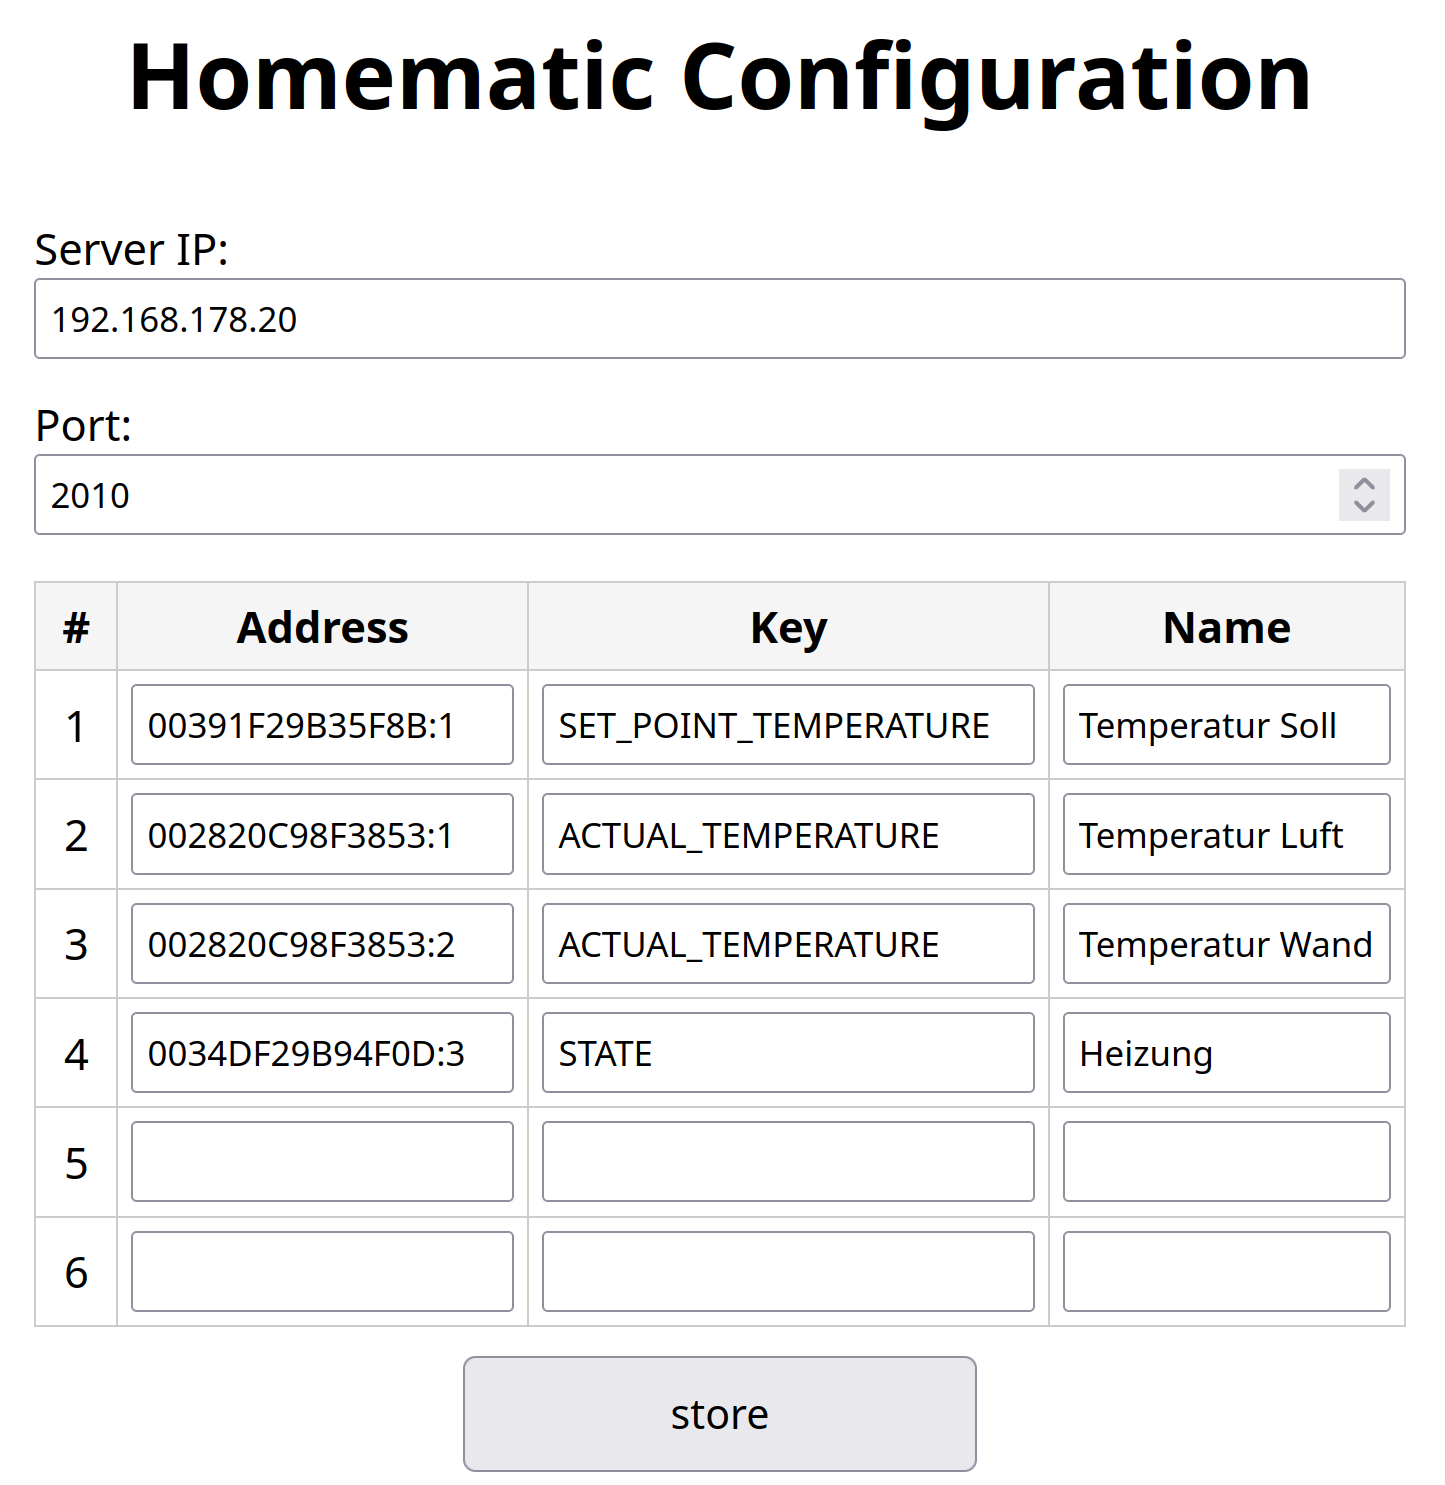
Detailed device configuration showing XML-RPC query parameters and sensor mappings for homematic
Setup Process:
- Connect to the inki setup WiFi network
- Access the web interface at http://192.168.4.1
- Configure your home WiFi credentials
- Enter your Homematic CCU IP address and port
- Add device IDs and value types from your Homematic system
- Set display labels and update intervals
XML-RPC Integration: The system uses standard Homematic XML-RPC calls like:
<methodCall>
<methodName>getValue</methodName>
<params>
<param><value><string>002820C98F3853:2</string></value></param>
<param><value><string>ACTUAL_TEMPERATURE</string></value></param>
</params>
</methodCall>
Technical Implementation
- Protocol: XML-RPC direct integration with Homematic CCU (port 2010)
- Power Management: Complete power-down between scheduled updates
- Wake/Sleep Cycle: RTC-controlled activation at configurable intervals
- Data Processing: Real-time XML parsing optimized for ePaper display
- Battery Life: Years of operation depending on update frequency
- Network: Automatic WiFi connection and CCU synchronization
- Service Monitoring: Automatic retrieval and display of CCU service messages
Questions? Ideas? Interested in a kit?
Contact: c0de@posteo.de